Frequently Asked Questions about GradSlate
View the list of frequently asked questions for faculty and staff for using GradSlate below.
View the list of frequently asked questions for faculty and staff for using GradSlate below.
Program Coordinators have access to a query that returns the status of all Applications in their Populations. On the Slate homepage, open the Programs tab and click the link Applications by User’s Populations (in the Applications section).
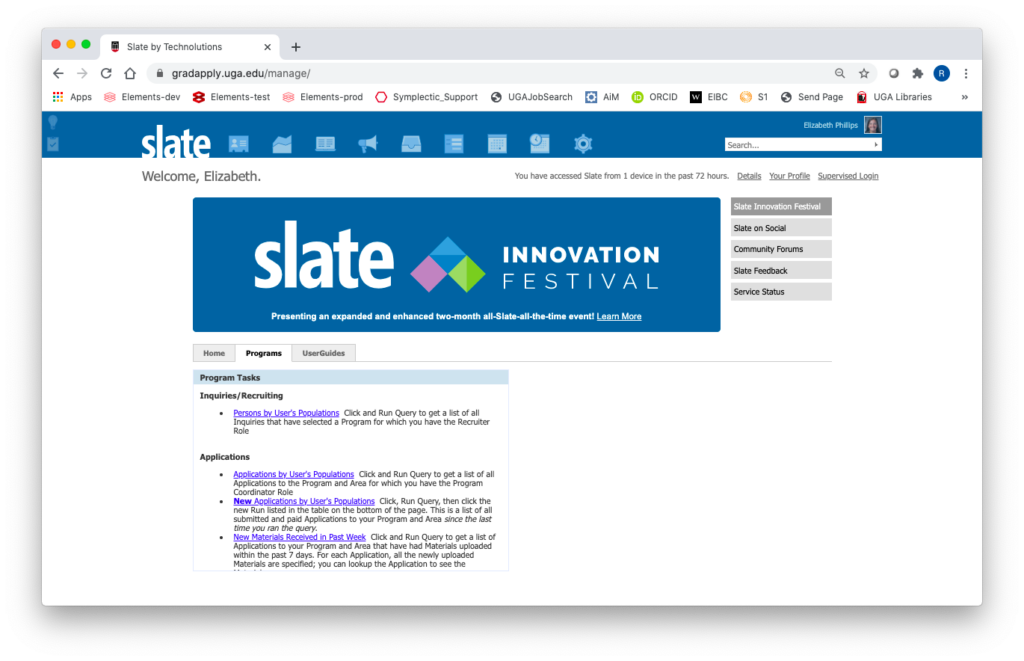
On the page that opens, click Run Query and you will see a list of all Applications in your Populations (that may be split among multiple pages):
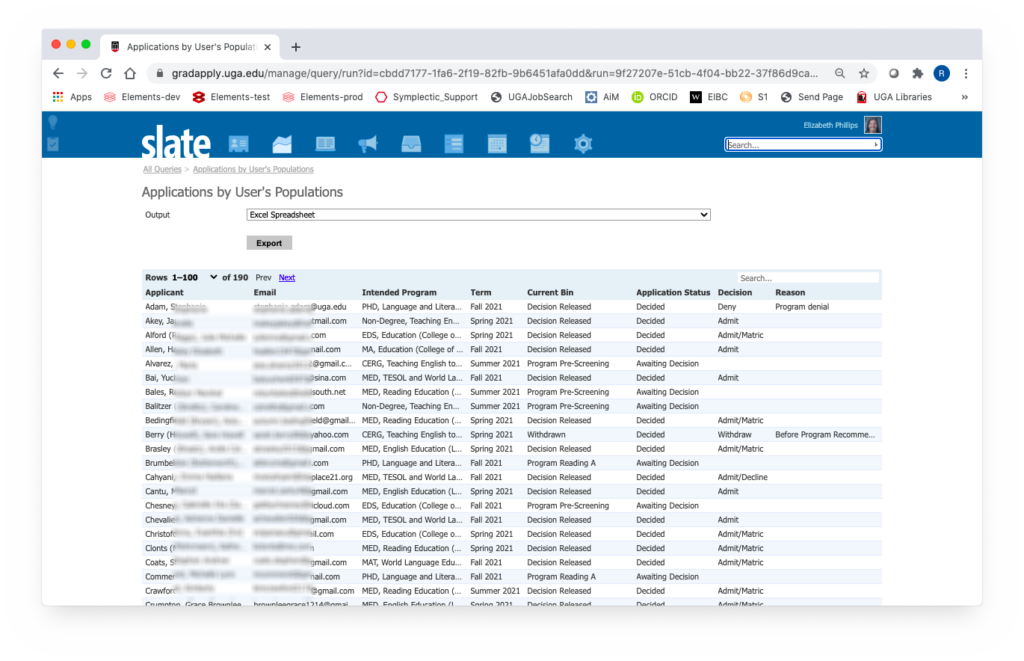
(If you prefer, you may export this list as a spreadsheet by leaving Excel Spreadsheet as the Output and clicking the Export button.)
This list indicates Application Status and Decision, which are interpreted below. If you want to see more detail about any particular Application, click on the applicant’s record, and on the panel that appears, click the Lookup Record link.
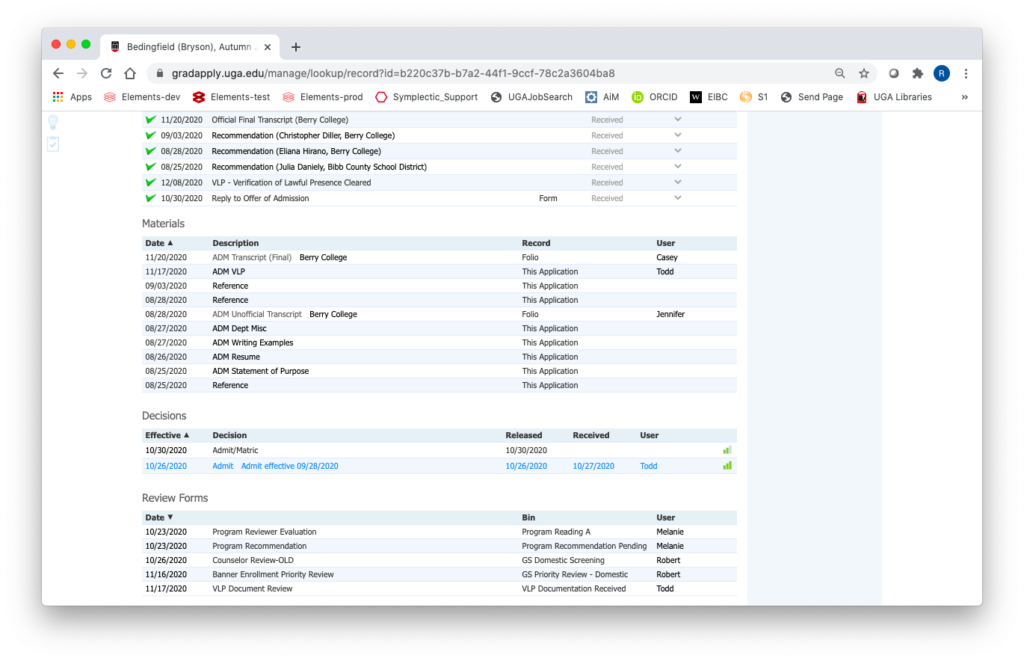
For Applications that have a Decision, this gives you access to the offer letter. Once in the Application tab, scroll down until you see the Decisions section, then click on the Admit (or Deny) Decision and a new panel will open showing details of the Decision. The text of the letter is in the right margin; use the Expand Preview link at top right to see a more formal version of the letter.
Application Status:
Decision (only available on Applications with Decided Status):
Program Coordinators have access to a set of queries that help them identify new Applications and keep up with receipt of new materials on existing Applications in their Populations. On the Slate homepage, open the Programs tab to see the query links in the Applications section.
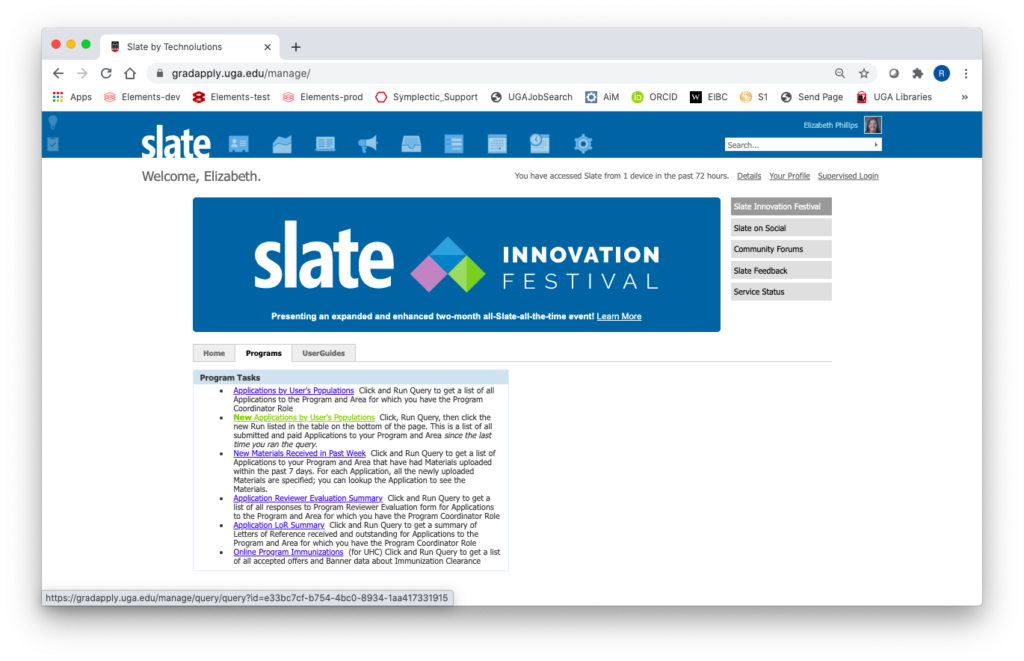
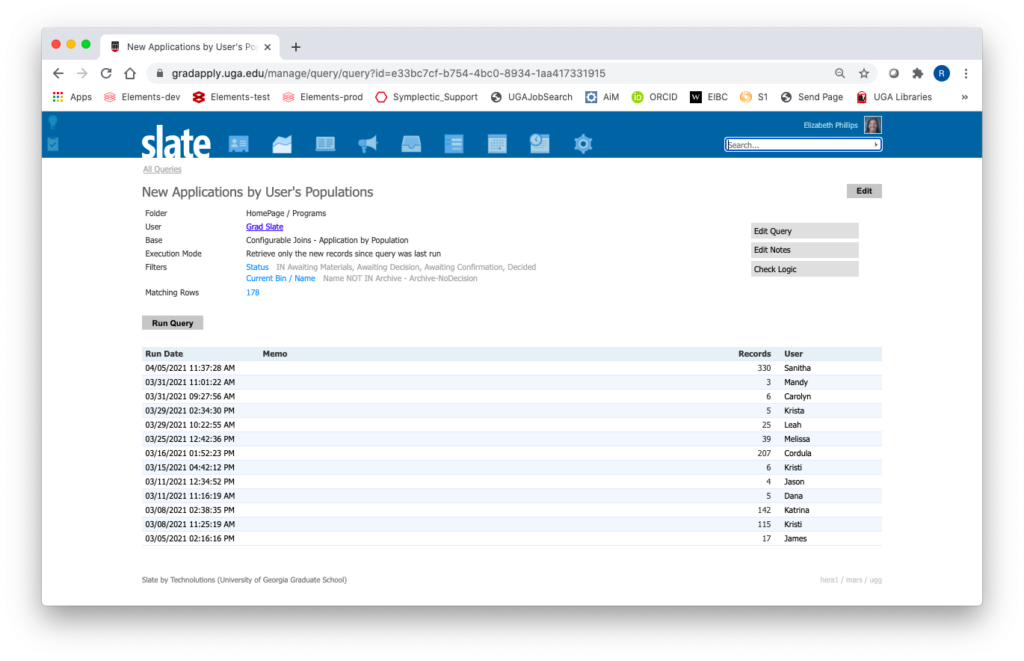
As its name implies, this query generates the same type of output as the Applications by User’s Populations query, but it only lists those Applications that were newly created since the last time the query was run (on your Populations). (The first time you run the query, it will list all Applications in your Populations.) For this type of query, each run of the query is logged so that it can be retrieved if necessary.
When you click the link, the page on which you run the query also contains a list of previous runs (by all Program Coordinators). Click on any of those runs to see the query output. Click Run Query to run it again and a new run will be created in the list. You can run this as frequently as you like; if there are no new Applications since the last run, no record will be created.
Knowing that new Applications have been created is useful, but a lot has to happen before the Application is ready for review. A number of documents need to be attached (Slate calls these ‘Materials’, including Statement of Purpose, Résumé, Transcripts, etc.; note that letters of recommendation are handled separately in the next query discussed). This query provides a means to identify those Applications for which new Materials have been uploaded (within the last 7 days). This implies that, during the active part of admissions season, you should run this query at least once a week to keep up with developing Applications.
Clicking the link in the Programs tab of the homepage, then clicking Run Query on the resulting page, generates a list of all Applications in your Populations that have had Materials uploaded within the past week.
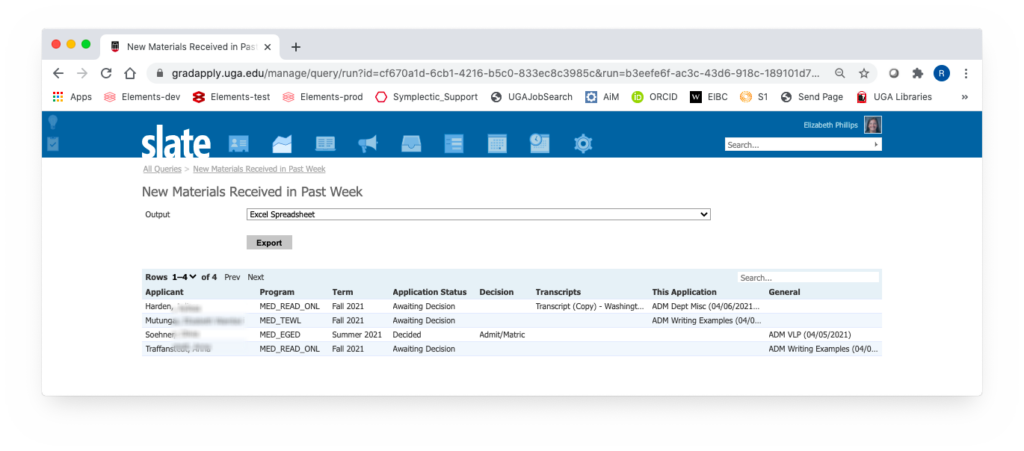
Materials are divided into three categories: Transcripts, This Application (these are documents that apply only to this application), and General (documents associated with the Person, across any of their Applications).
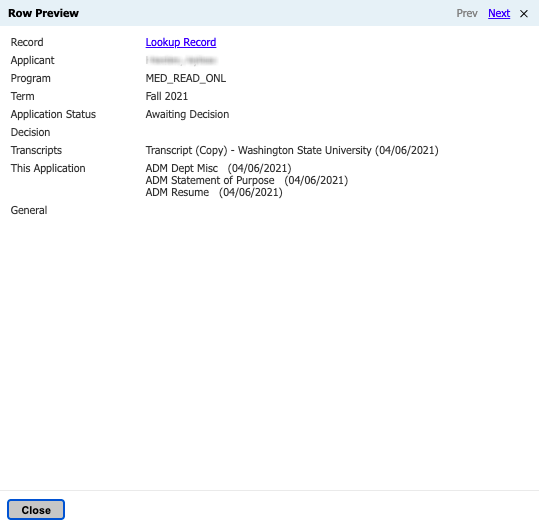
Clicking on any Application record in this list gives you a more detailed look at the Materials and the date received, and allows you to go to their detailed record (Lookup Record) to examine the Materials.
Applicants list references in their Application and upon submission, those references are contacted (by the system) and are asked to upload a letter of recommendation (LoR). In addition, these LoR are added as Checklist Items that are tracked by the system on the Application and on the applicant’s Status Portal.
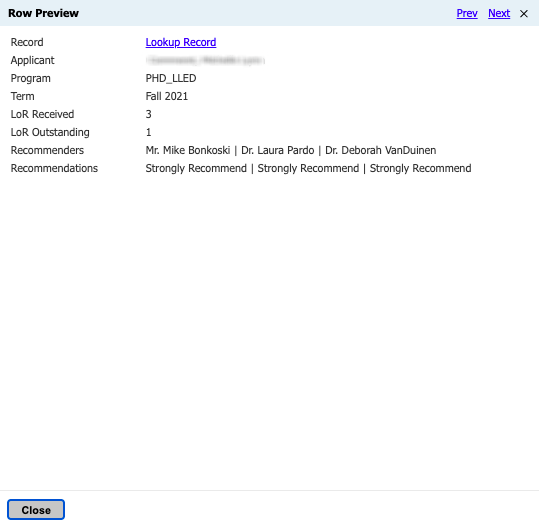
This query reports on these LoR Checklist Items. For all Applications in your Populations, it counts how many LoRs are required and how many have been received. Clicking the link in the Programs tab, then clicking the Run Query button, generates a list of Applications, sorted by Intended Term. Within a Term, they are sorted by how many LoR are still outstanding (not yet received). This places the “more complete” Applications at the top of the Term list.
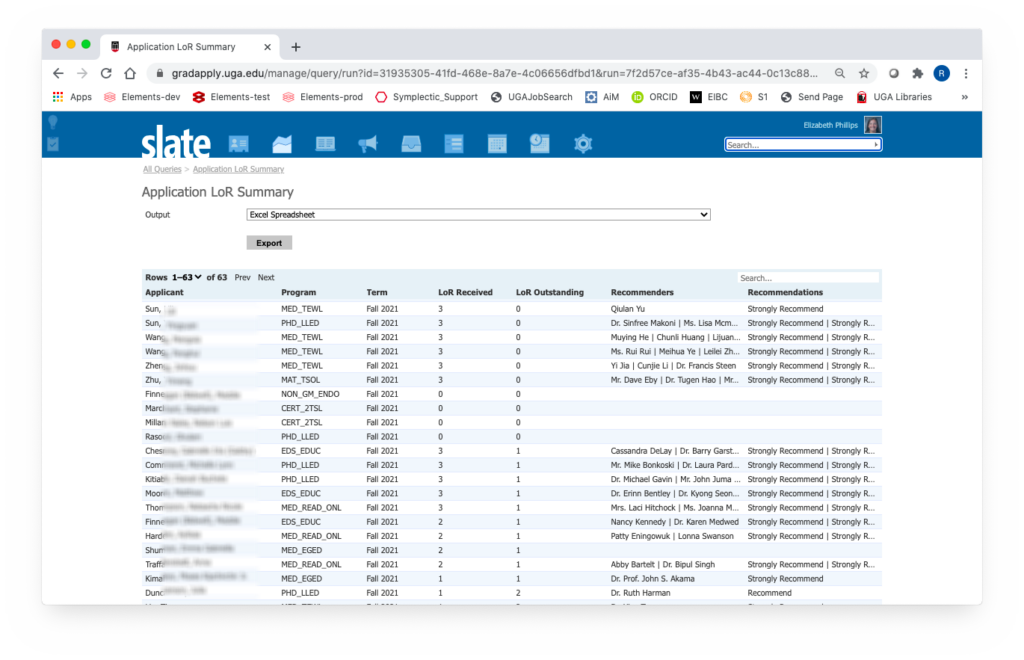
The query results also list the Recommenders and Recommendations. For a more detailed view of these, click on any record to see the list of recommendations. Use the Lookup Record link to go to the detailed Application. Look for ‘Reference’ in the Materials section to examine any LoR.
You can use the Search box in the upper right of the Slate menu to find the Person Record for the Application in question. Open the Application tab and click the Material Upload link at the bottom of the first section of the Overview.
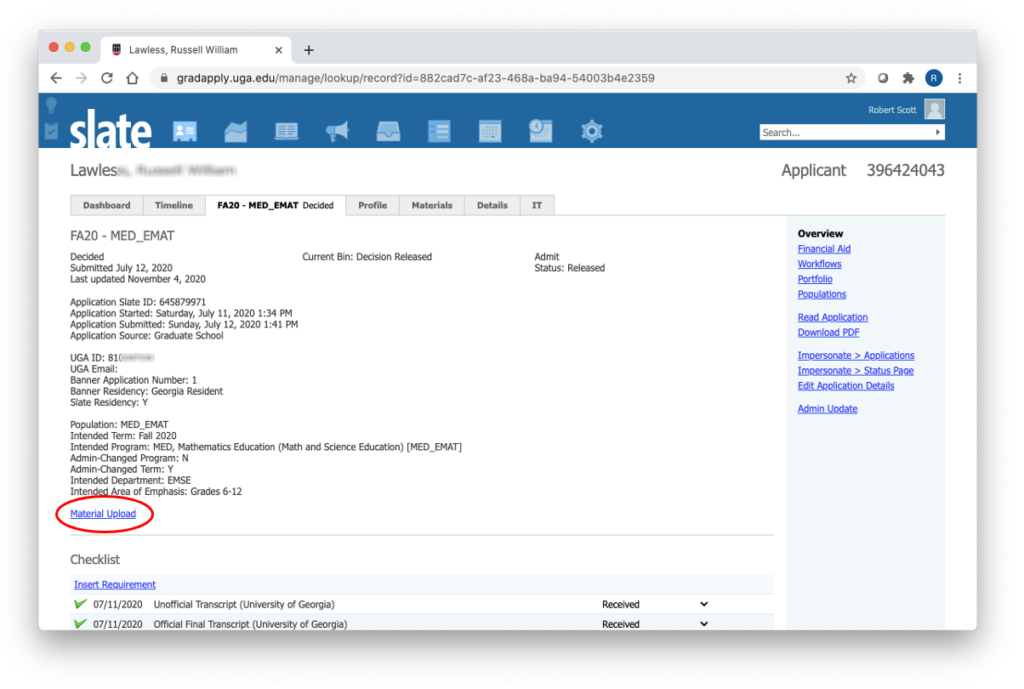
(Note that the Material Upload page opens in a new browser tab; when finished uploading, you can just close the tab to get back to the Person Record.)
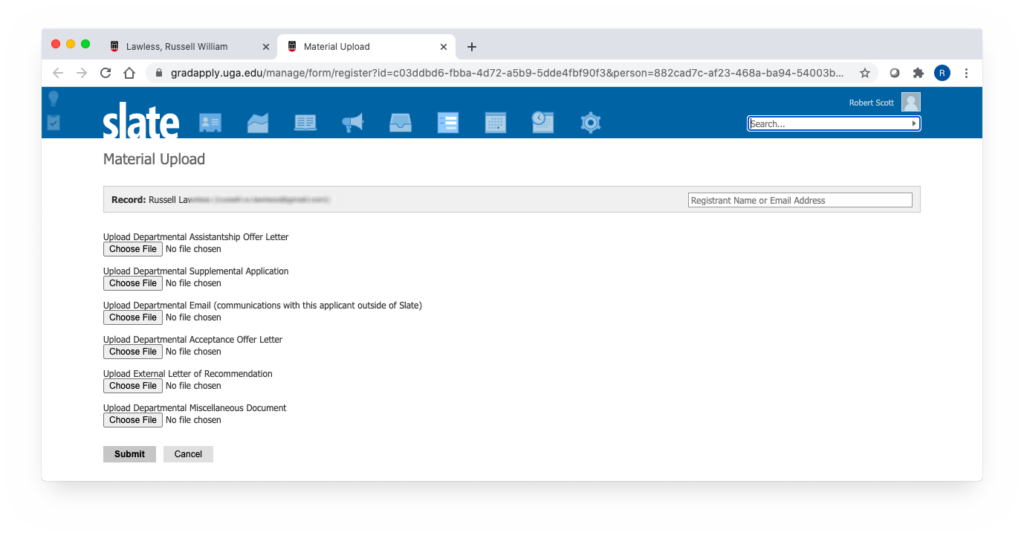
Currently, you have the ability to upload six Material Types: Departmental Assistantship Offer Letter; Departmental Supplemental Application; Departmental Email (communications with this applicant outside of Slate); Departmental Acceptance Offer Letter; External Letter of Recommendation; Departmental Miscellaneous Document.
In each case, you click on Choose File, find the document on your computer, then click Submit. You should then see the uploaded document in the Materials section of the Application tab, in the Materials tab on this Person Record, and in the Reader.
If you end up with too many Applications in a Reader Bin to allow you to easily focus on the ones of interest, you have several options to restore your focus.
Clicking on any Bin takes you to the Reader Search tab and displays several columns of data for all the Applications in that Bin. By default, the Applications are sorted by Applicant name.
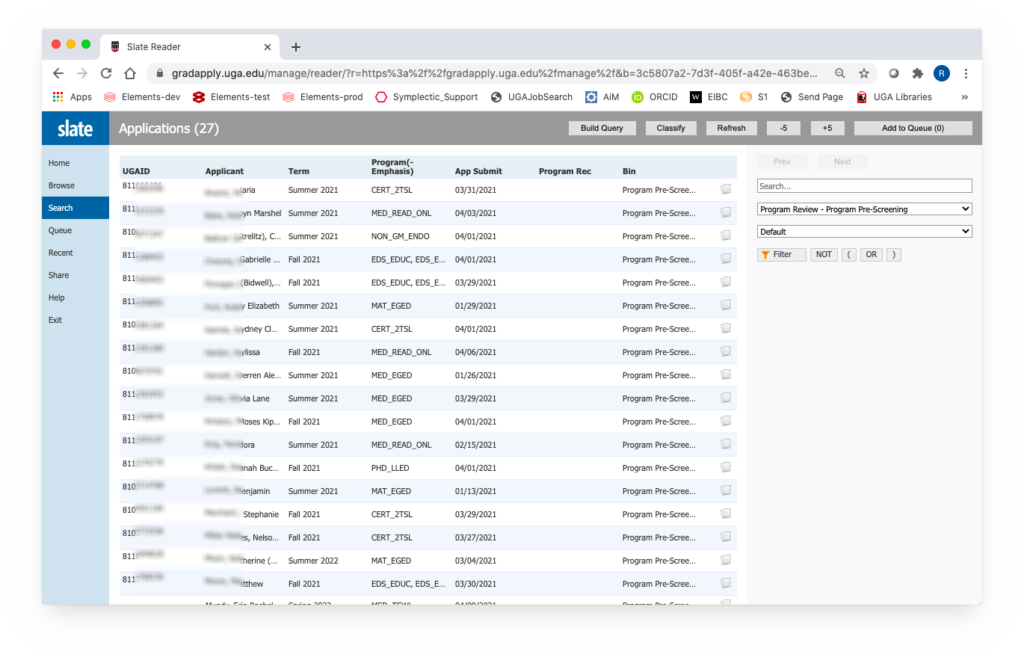
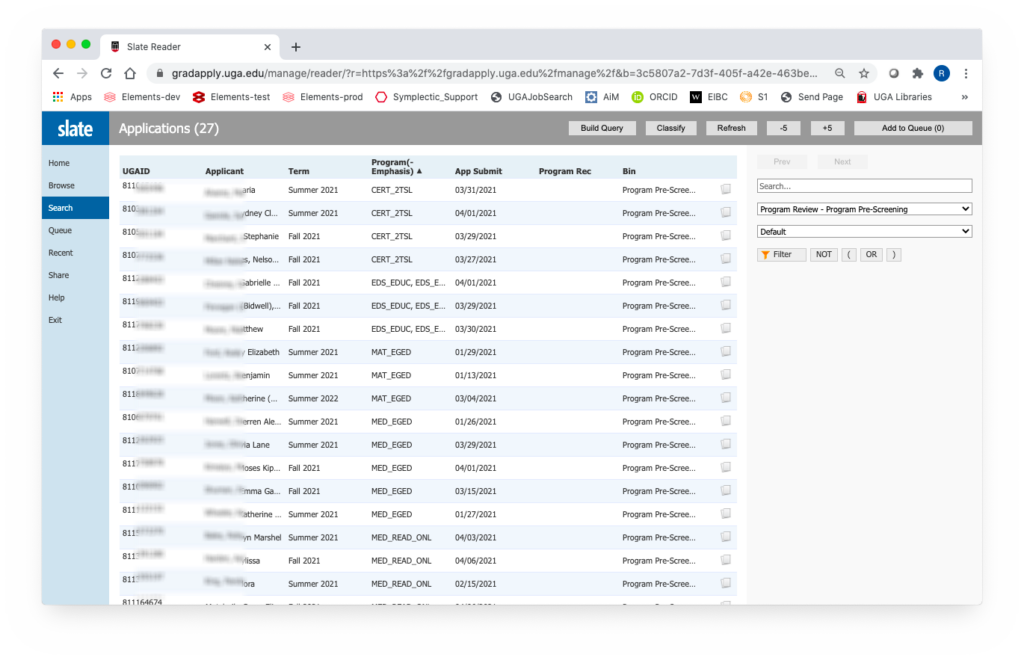
Clicking on the column heading of any of the other columns re-sorts based on values in that field and displays a triangle icon pointing up. This indicates an ascending sort. If you would prefer to sort in a descending order, click the triangle icon and it will invert the values in that field. For example, if you want to sort by Program Recommendation Date in reverse chronological order, click the Program Rec column heading, then click the triangle icon. Or, if you want to sort by Program(- Emphasis), click that heading:
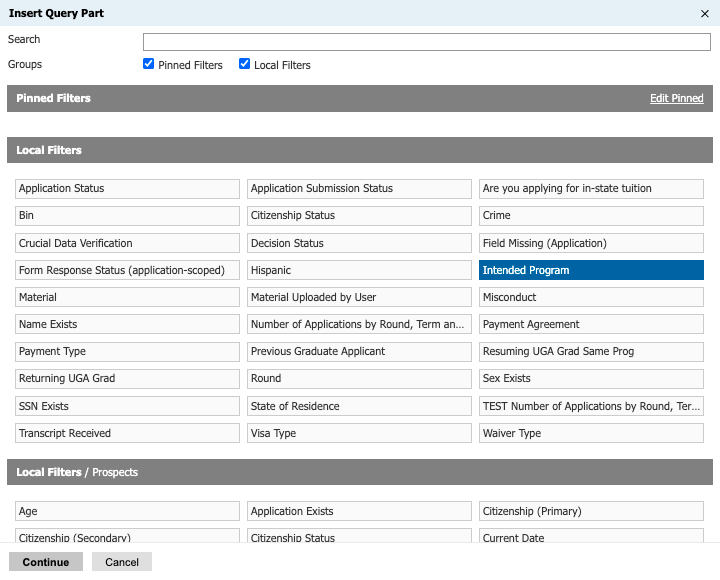
In the right panel, clicking on the Filter button pops up a panel that shows all the fields you can use to create a filter so that you only see the Applications you need at this time (i.e., this filters only your view of Applications). In the Filter panel, fields are grouped into sections and you can use the Search box to find a field of interest. For example, if you want to restrict your view to only Applications to a specific program, choose the Intended Program field and click Continue.
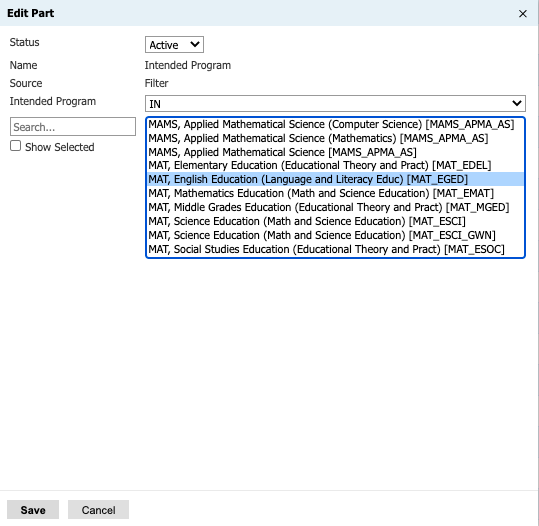
You will see a list of all Programs, from which you can select the Program of interest (use the Search if necessary):
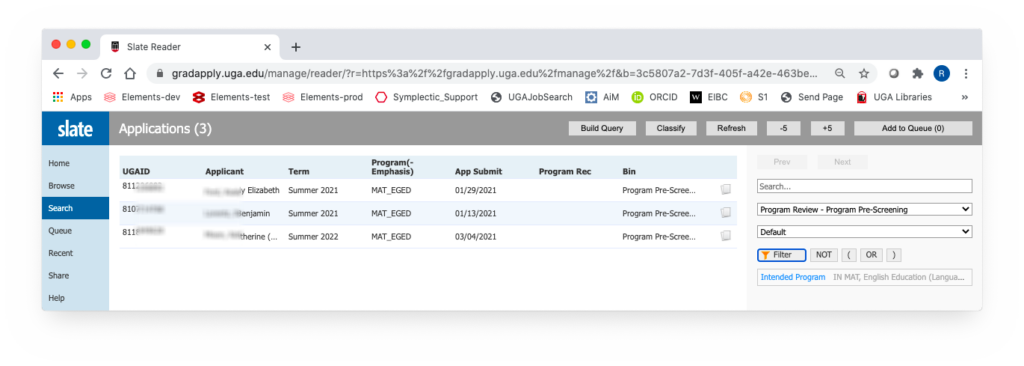
Clicking on Save applies the filter and restricts your Application view:
You can build Boolean combinations for your Filter. For example, if you only wanted to see those Applications for the MAT_EGED Program that are applying for Summer 2021, open the Filter panel again, select the field Intended Term (search for it), set the value to Summer 2021, and Save.
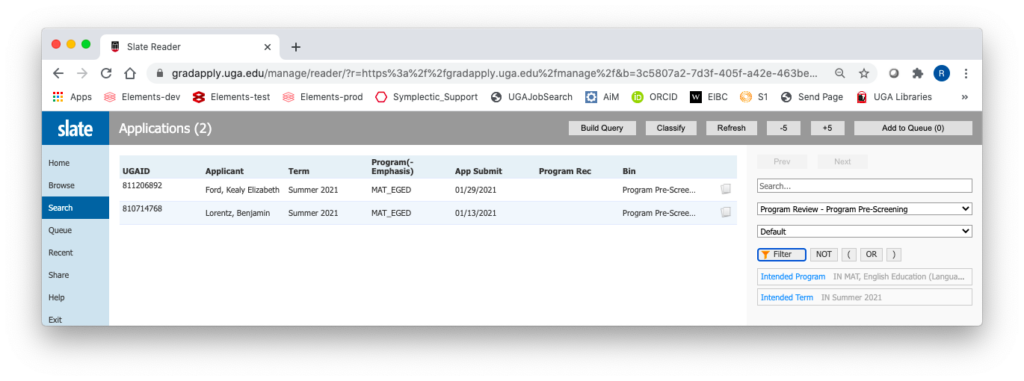
Two fields adjacent implies .AND. Boolean logic (Applications must have both this Intended Program and this intended Term). You can also build more complex logic using the parentheses, the .OR. and the .NOT. selections in the Filter.
You can remove or edit a Filter by hovering over the box that was created and clicking the X or pencil icon, respectively.
Sometimes you may be looking for a particular Application. The Search box at the top of the right panel allows you to find Applications by applicant name. Your search text must be one or more characters at the beginning of any of the applicant’s names (first, middle, last).
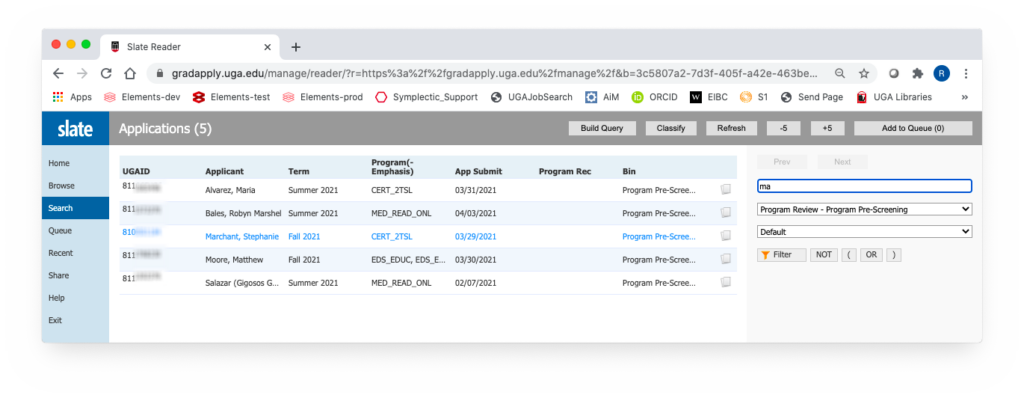
It is helpful to be able to quickly monitor the Application review by your Program Reviewers. Assuming this review is conducted within GradSlate (in the Reader), you have access to a query that will provide a summary of the responses on the Program Reviewer Evaluation forms associated with each Application.
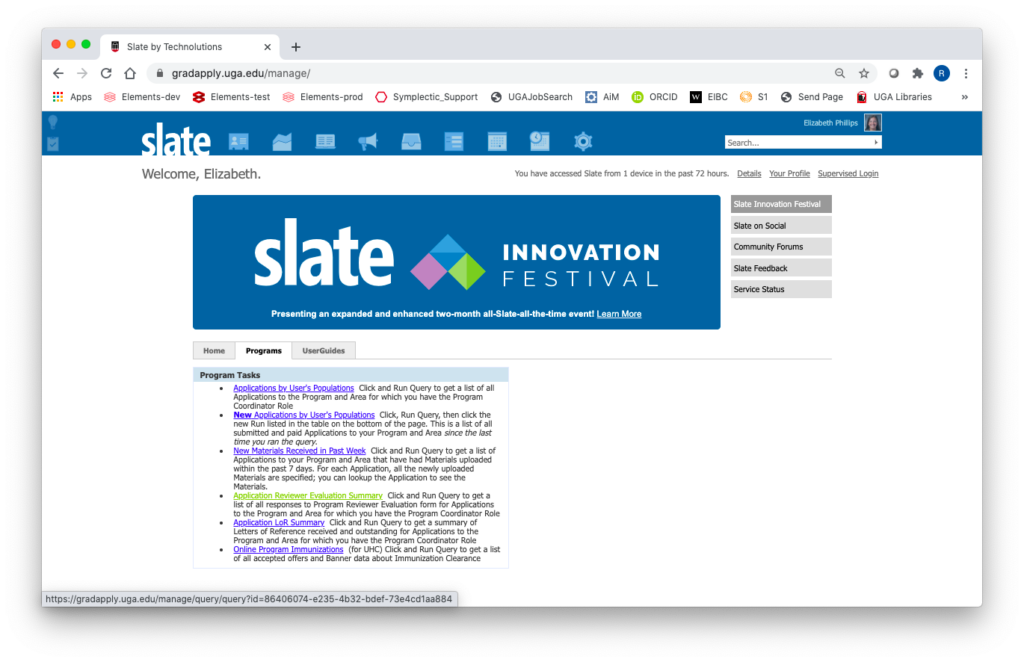
In the Applications section of the Programs tab on the GradSlate homepage, choose the Application Reviewer Evaluation Summary link, then click the Run Query button on the page that appears.
This query shows the Program Reviewers who have submitted a form, the scores (ratings) assigned by each reviewer, and calculates the average score. The comments entered by the reviewers are also provided.
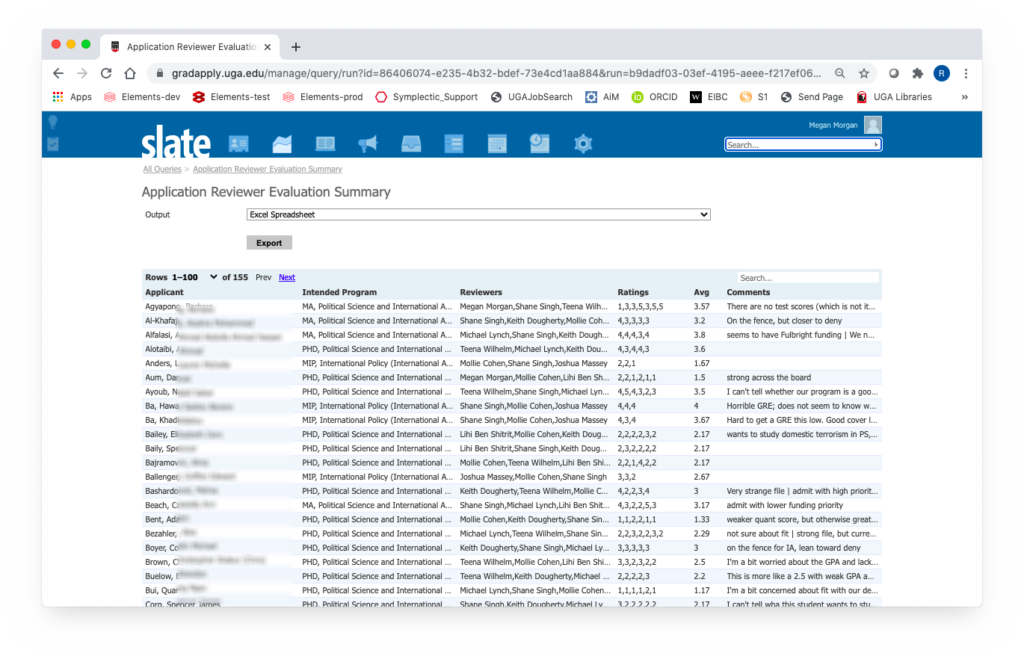
(This list can be exported as an Excel spreadsheet by using the Export button.) Click on any individual Application record to see everything in that record:
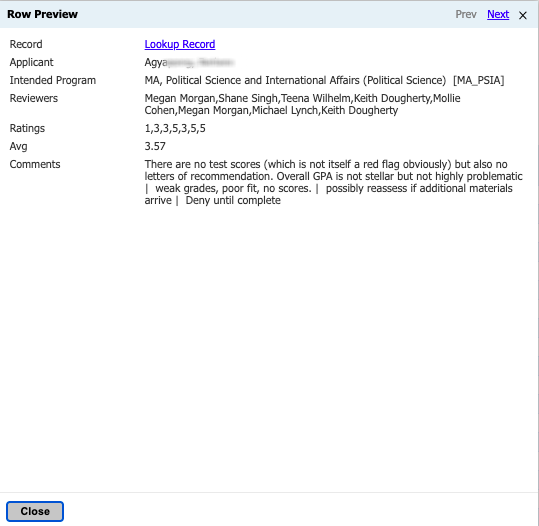
Use the Lookup Record link to see the complete review forms.
To be able to use GradSlate for graduate application review, Users must be assigned Roles (Program Coordinator, Program Reviewer, Program Reader) in specific Populations. The first step in this process is to provide these faculty / staff with GradSlate User accounts.
To request a User account for a UGA faculty / staff who doesn’t already have access to GradSlate, use the Request to Add New User link, which is found in the Users / Roles section of the Programs tab on the GradSlate homepage.
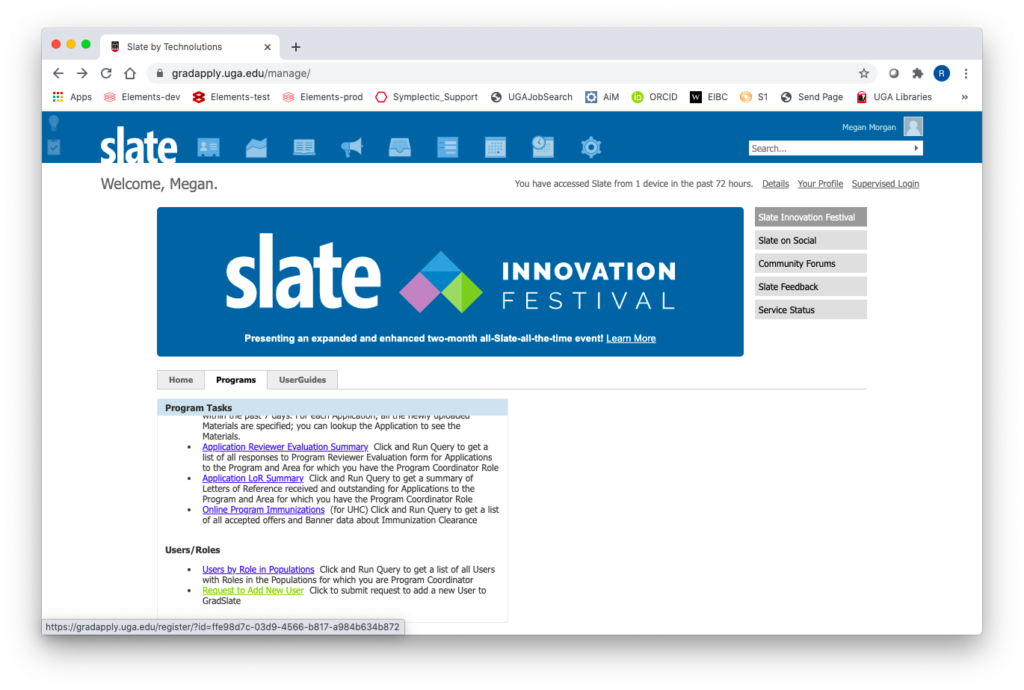
This link brings up a form to fill out to submit the request (below). Red asterisks indicate required fields.
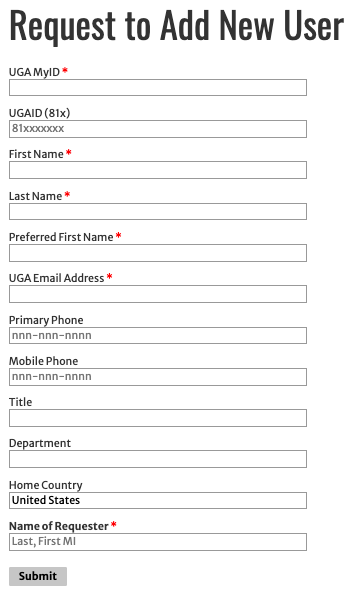
Once the form is submitted, it may take a day or two to get the User account created. The new User will receive an email to alert them that they have a new account on Slate.
Assignment of Users to specific Populations (Programs and Areas of Emphasis) is currently handled by submission of a spreadsheet. Use this template and submit to gradadm@uga.edu.
The Graduate School
Brooks Hall 310 Herty Drive Athens, GA 30602
706.542.1739